Creative and Inspiring Wedding Invitation Ideas


Your big day is a once-in-a-lifetime celebration of love, happiness, and two families joining together. As a result, you’ll want every detail to be a reflection of the special journey that brought you to this moment. From the choice of venue to the wedding invitations, every aspect of your wedding day should be a reflection of you.
That means you won’t want a wedding invitation like everybody else. Although traditional wedding invitations are elegant and professional, there’s no reason fun wedding invitations can’t be equally beautiful! In this post, we give you 10 unique wedding invitation ideas that will make your big day unique and memorable. We include some vendors you can work with, what materials you may need, and how you can DIY these invitations. Let’s get started!
10 unique wedding invitations
Check out these 10 ideas for unique and unusual wedding invitations.
1. Scratch-off invitations

The idea
You know those scratch-off lottery tickets you can buy? Think of that, as a wedding invitation.
Scratch-off wedding invitations are a fun and interactive way to invite your guests to your big day. Your guests can scratch off metallic shapes to unveil the time, date, and location of your big day. This novel approach to wedding invitations adds an element of playfulness and sets the tone for your big day.
What you’ll need
- A printer or calligraphy ink
- Design software if digitally designing
- Scratch-off stickers. You can get a bag of 50 for around £1
- Cardstock
- Cutting tools
- Sealant spray
- Envelopes
Method
Step 1. The first step is to design your invitation. You can either do this by hand using ink and rulers, or on a computer using design software. When creating a scratch-off design, you’ll need to set your invitation out in a specific way. The time, date, and place of your wedding will need to be separate on the design. This way, you can place scratch-off stickers over the information once printed out.
Step 2. If working with a computer, you’ll need to print your design onto cardstock. If hand-designing your invites, you’ll need to cut them out of a larger piece of paper.
Step 3. Apply the scratch-off stickers over the crucial information. Check the instructions for your stickers to check if you need sealant spray. If not, you can place the invite in an envelope and send it off. If you do need sealant, be sure to let the sealant dry properly before placing the invite in an envelope. Otherwise, the sealant may stick to the envelope, and your guests will struggle to open it!
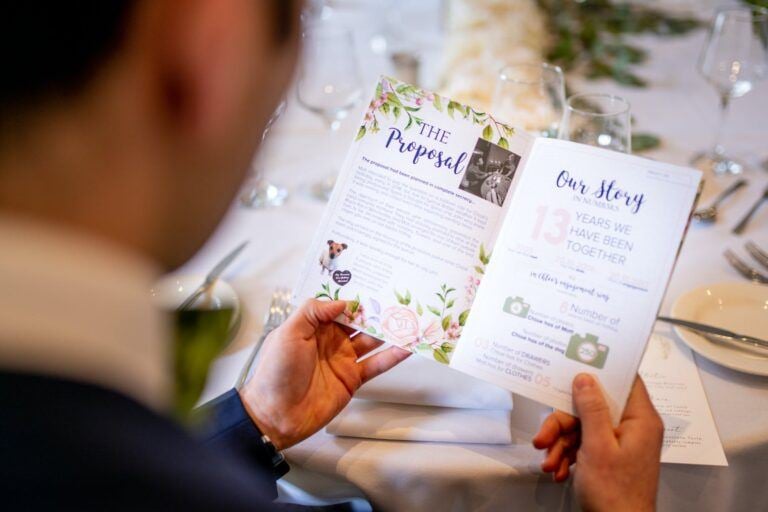
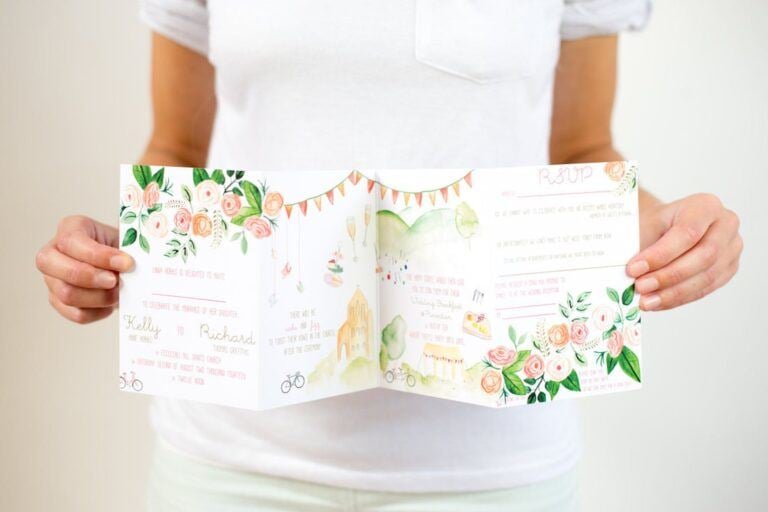
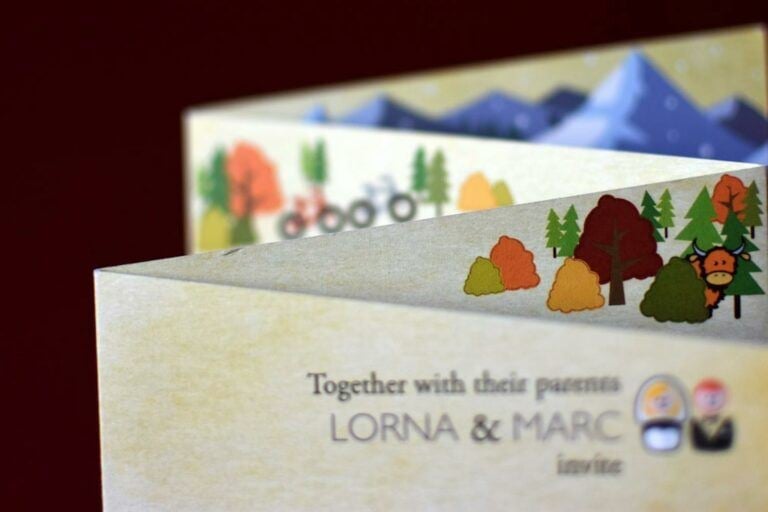
2. Storybook invitations
The idea
A storybook invitation is perfect for a forest, castle, or other whimsical-themed wedding. A storybook invitation will be a little more expensive to produce, but it’s a beautiful way to tell your love story and invite your guests to the happiest day of your life.
A storybook invitation is set out like a book. It will usually have a more durable cover and thicker, high-quality pages to enhance its appeal. It should have little illustrations throughout, and the information should be written as a story to support the whimsy.
This invitation style will likely be kept as a keepsake for years to come, so be sure to pick durable materials and choose elements that will stand the test of time.
What you’ll need
Because of the nature of these invitations, it’s best to employ the help of a professional stationer. We recommend:
Any of these specialist wedding invitation stationers will be able to help you with your design. However, there are still some steps you’ll need to take.
Method
Step 1. You’ll need to write the wording for your wedding invitations. Work with your designer to find out how many pages you’ll need to fill. If you’re struggling with that to write, try something like this:
“Once upon a time, there was a [handsome prince/beautiful princess/magical imp]. They decided they would go on a walk in the Forest of [how you met your significant other. For example, the Forest of Blind Dates]. Unfortunately, they got lost. They were very frightened, alone in the woods. They continued to walk in the forest when they came across a clearing. And there they saw [the king/the queen/a mysterious time traveller], the most beautiful person they’d ever seen. It was love at first sight. They agreed they would be married at once, and everyone in the [kingdom/queendom/magical land] was invited.”
Feel free to mix up this story to include special moments in your relationship. Try including inside jokes from your hen do/stag party, when you were dating, or other sweet anecdotes to help your guests feel more involved with your story.
The final page of your story should include all the details of your fairytale wedding. Be sure to include the time, date, place, and dress code as a minimum.
Step 2. Work closely with your designer to fit your story onto the pages of your invite. They may recommend that you have some illustrations made to enhance the fairytale feel. If you’re creative or artistic, you can create these illustrations yourself.
Step 3. Select a font that complements the fairy tale theme and enhances the readability of your story. A script or calligraphy-style font can add a touch of elegance and add to the whimsy of the invite.
Step 4. Once you have finalised your invitations and received the finished pieces, pack them into large envelopes (potentially the ones with bubble wrap) and post them to your guests.
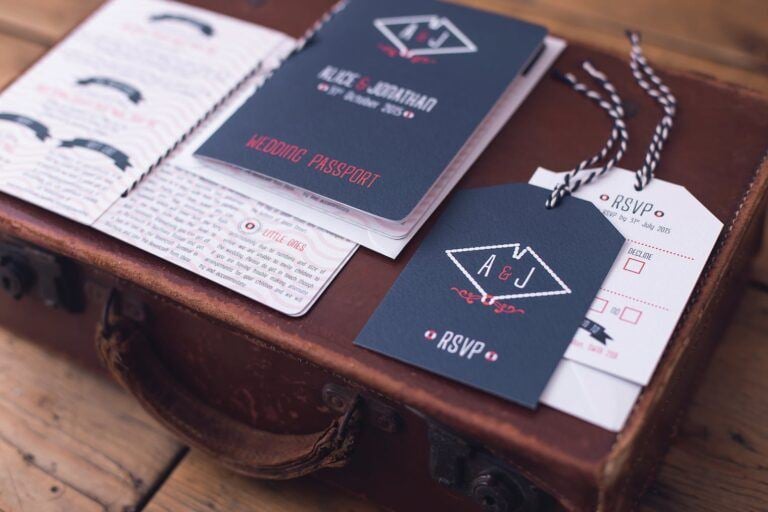
3. Passport invitations/boarding passes
The idea
Passport invitations or boarding passes are perfect for a destination wedding, for couples who met on holiday, or for those with a love of travelling. They’re easy to DIY with the help of a little technology and creativity.
What you’ll need
- A printer
- Cardstock
- Cutting tools
- Envelopes
Method
Step 1. Design your passport or boarding pass using digital design software. You can either create your own design or try searching any of the below vendors for a template which you can then customise:
Step 2. Print out your design and trim using cutting tools. Fill in details like the names of guests.
Step 3. Place your invite in an envelope and send it to your guests.
4. Vintage postcard invitations
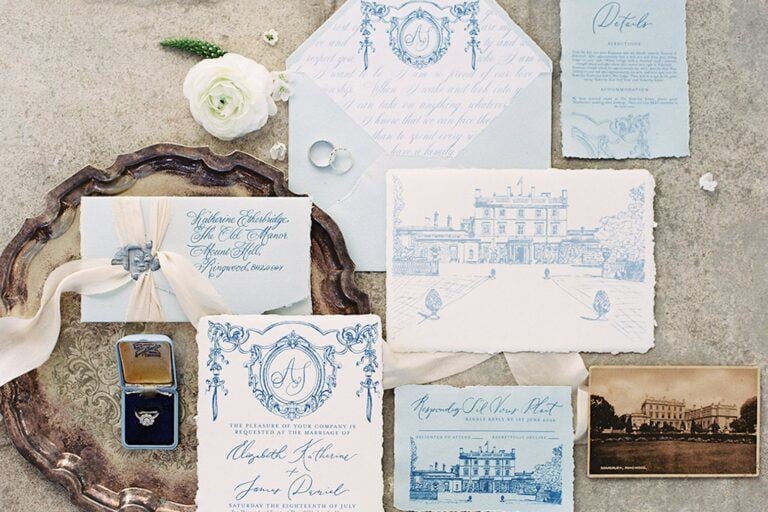
The idea
Vintage postcards are similar to creating your own boarding pass or passport. All you’ll need is a digital template or inspiration piece, and you’re good to go!
Try creating a vintage postcard based on where you met your partner, a place that holds special significance, or where you’re getting married. Bonus points if this location has a special historical significance of vintage flair. For example, a sweet café in Paris.
What you’ll need
- A printer
- Cardstock
- Cutting tools
- Envelopes
Method
Step 1. Design your postcard using digital design software. You might want to use an actual vintage postcard or digitally edit a new postcard to look vintage.
Step 2. Print out your design and trim using cutting tools. Fill in details like the names of guests on the back.
Step 3. Place your invite in an envelope and send it to your guests.
5. QR code invitations
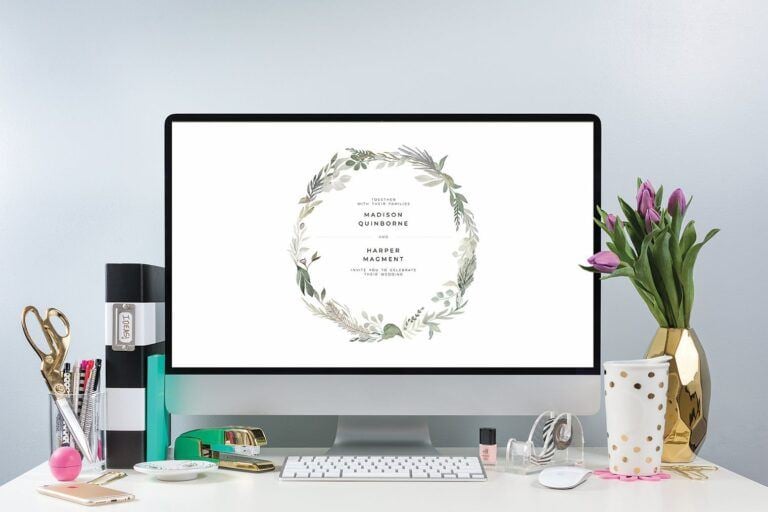
The idea
QR codes are a modern and increasingly popular way to share your wedding invitation.
This will require quite a bit of background work before you can send a QR code in the post. For example, you’ll need to create a wedding website with information about the time, date, and location of your wedding. However, this can be handy as you can store all your wedding information in one place for guests to access.
What you’ll need
- A wedding website
- A QR code generator
- Design software
- A printer
- Cardstock
- Envelopes
Method
Step 1. Your first step will be to create a wedding website. This will act as the landing page for your QR code and include all the essential information about your big day. You can have a professional help you with this, but it’s also easy to create a simple website using online guides. You will need to consider:
- Which host you will use. There are a range of website hosts you can use, and they vary in price. Some are free like WordPress, whereas websites like Squarespace are a little pricier but come with beautiful, easy-to-customise templates.
- The design of your site. It’s recommended that your website’s design matches your wedding’s theme. The level of design will depend largely on your skill level, but you can employ a professional to help you with this.
- Your essential wedding website pages. You should include the following pages: Home, Key Details, RSVP, Travel Plans, Gift Registry, Gallery. You could also include additional pages that add a personal touch and enhance the overall experience for your guests. For example, Our Story, Dress Code, Social Media Hashtags, Countdown, Song Requests, and even Fun Facts.
Lots of website hosts will allow you to create a QR code that links to your website. You’ll need a QR creation tool if they don’t.
Step 2. Find an online QR creation tool, like Adobe’s free QR code generator. This image will link back to your website, where guests can find all the information they need about your big day. Once you’ve created your QR code, download it as an image file ready for printing.
Step 3. Use design software to create an invitation that centres your QR code. You can put this in an envelope and send it to your guests as you would a paper-based wedding invitation. It’s traditional but with a modern twist.
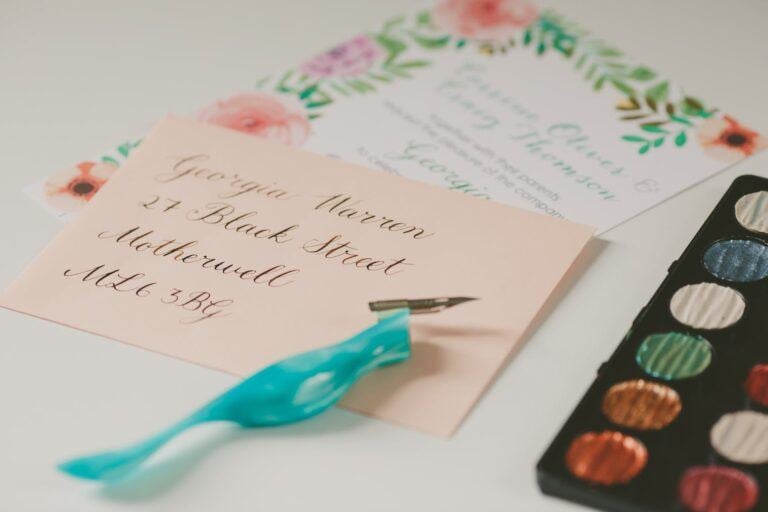
6. Hand-painted invitations
The idea
Hand-painted wedding invitations offer a personalised and artistic touch. Plus, they’re easier to create than you might think!
What you’ll need
- Cardstock
- Watercolour paint
- A paint palette or an old saucer
- Brushes
- Calligraphy ink
- Envelopes
Method
Step 1. Put a small blob of the paint colours you’d like on your palette. Be sure to keep them far apart so they don’t mix and get muddy. Add water to the paint until they become translucent.
Step 2. Apply the paint to your cardstock in unusual shapes and patterns. Don’t worry about it being too perfect –- it’s supposed to look abstract! Wait for the first layer to fully dry before adding a second. Build up the layers until the invitation is bright enough. If you prefer a more delicate, pastel look, only use one or two layers of paint.
Step 3. Allow the paint to fully dry before writing your wedding details over the top. Once the ink from the information has dried, pop your invitations in an envelope and send them to your guests.
7. Origami fortune teller invitations
The idea
Remember the fortune teller origami games you made at school? You might have also called them whirly birds or cootie catchers? Have you considered making them into a wedding invitation? They’re a fun and unique way to engage your guests and add a playful touch to your wedding invitation.
What you’ll need
- Design software
- A printer
- Specialist printer paper
- Envelopes
Method
Step 1. You might benefit from making a draft fortune teller, marking each section, and then unfolding it so you can know exactly what information to put where. This way, the information will sit in the right place when the fortune teller is all folded up.
Step 2. Begin creating different sections of the fortune teller in your design software. Clearly label each section with the information it will contain, such as date, time, venue, and RSVP details.
Step 3. Print a draft of the fortune teller and fold it up to check the layout. This step ensures that when your guests fold the fortune teller, the information will be presented in the correct order.
Step 4. Print the fortune tellers on high-quality printer paper or cardstock. Consider using slightly thicker paper to ensure durability.
Step 5. Pop the fortune tellers in the envelopes and send them to your guests.
8. Magnetic Invitations
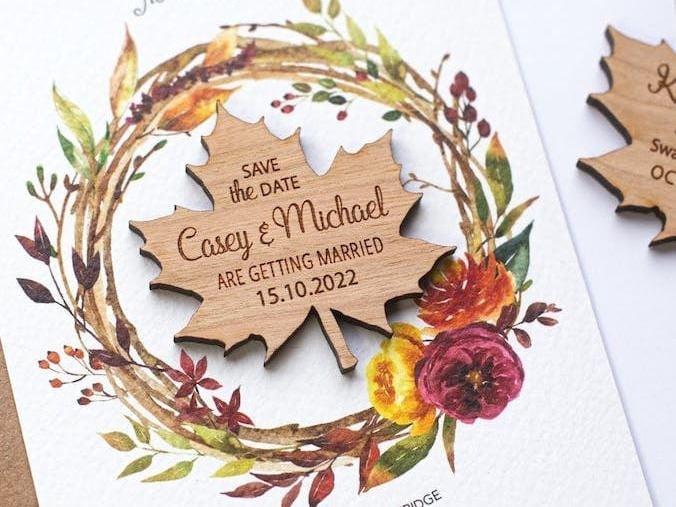
The idea
Did you know you can print your wedding invitation onto a fridge magnet? Magnetic invitations are a practical and memorable way to ensure your guests don’t miss your wedding details every time they reach for a snack. They’re great for the busy (or disorganised!) people in your life, and work particularly well for save the dates.
What you’ll need
Look for printing companies or specialised vendors that offer magnetic printing services. Check their reviews, portfolio, and the types of materials they use to ensure quality. We’ve got plenty of suppliers right here on Bridebook who offer fridge magnet style wedding invites. For example:
- Jacob’s Island Press
- Josephine and Daughters
- Wedding Graphics Studio
- Wishful Inking Limited
- NIVI Design
Method
You’ll need to work closely with a vendor to design your magnetic wedding invitations. You can work together on your designs, font, colours, and more. Ask them to create one on the first run. This way, you can quality-check the item and make sure everything has come out the way you expected. Once they’re all approved, you can create a larger batch and send them out to your guests.
9. Custom puzzle piece invitations
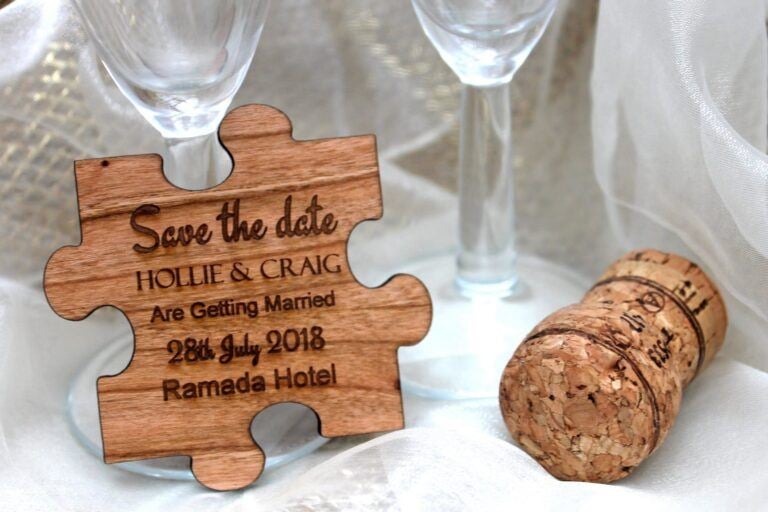
The idea
Printing your invitation onto a puzzle and asking guests to put it together adds a fun and interactive element to sending your wedding invitations. You should make it fairly easy to solve. Think 20 pieces or less. It would be a bit embarrassing if no one could solve the puzzle so no one showed up!
What you’ll need
As with the magnetic invites, you’ll need to work with specialist vendors to help you create your puzzle invitation. These vendors typically specialise in unique and creative invitation designs, and will have specialist equipment to help you achieve your creative wedding invite. These will include custom printing, die-cutting, and intricate paper engineering.
Method
You’ll need to work closely with them to design the size, shape, and complexity of the puzzle pieces. Discuss your vision for the overall aesthetic, theme, and colour scheme to ensure that the final product is exactly what you’d hoped for.
10. Message-in-a-bottle invitations
The idea
Message-in-a-bottle invitations are great for beach bums, sailing couples, or anyone with a sense of adventure. These invitations are designed, printed off, rolled up, and placed in a bottle. We won’t go as far as to say guests should go looking for them on a beach! However, it might be an idea to hand-deliver these precious parcels instead of sending them in the post.
To enhance the experience, try incorporating beach sand, tiny seashells, or even a subtle maritime fragrance within the bottle. This provides a multisensory experience for your guests as they unseal and read the message.
What you’ll need
- Glass bottles
- Candle wax
- Corks
- Cardstock
- Any additional elements like seashells or beach sand
Method
Step 1. Start by picking your glass bottles. While you can of course purchase matching glass bottles, it adds to the rustic appeal if they’re all different. Try collecting them as time goes on or visiting a second-hand shop or charity shop to see if they have unique and eclectic options.
Pro tip: Use nail varnish remover and a cotton ball to remove any sticker or label residue.
Step 2. Design and print the invitation messages on durable cardstock. Consider adding a touch of creativity to the message to align with the adventurous theme. At this point, you should add any seashells, sand, or other elements you’re considering using. Roll each message tightly, making sure they fit easily into the chosen bottles.
Step 3. Cork every bottle and seal it with some melted candle wax. This step seals the bottle and adds a rustic, nautical aesthetic to your invitations.
Step 4. While posting the invitations is an option, the true charm of a message-in-a-bottle experience is heightened when delivered by hand. Plus, this way, there’s no risk of the bottle breaking during delivery.
The bottom line on creative and inspiring wedding invitations
Although they take a little more effort, creative and inspiring wedding invitations set the tone for your big day and can be a memorable keepsake for your special guests.
There are a number of options for unique and unusual wedding cards, and each one is just as beautiful as they are fun. Ultimately, it’s up to you and your partner which one will suit your wedding best. Our top tips are to look for inspiration online, work with a trusted vendor, and not be afraid of redesigning or reworking if something goes wrong.
If you’re feeling crafty and want to tackle your own wedding invitations, we’ve collated a brilliant guide to how to make DIY wedding invitations. We also have a great roster of professional stationers who are ready to help you craft your wedding vision.
You Might Also Like…
- How to Make DIY Wedding Invitations
- How to Save Money on Wedding Stationery
- What to Write in a Wedding Card: Top Tips and Examples
- What to Write in a Wedding Thank You Card: Top Tips and Examples
Happy Planning!
Related articles