How to Create a Wedding Seating Chart: A Step-by-Step Guide


Wedding planning is so much fun! You choose your venue, sample wedding cakes and browse menus. It’s so exciting deciding how your big day is going to shape up with the love of your life.
That is, until it’s time to do one of the most challenging parts of the entire wedding planning process: the seating chart. With family politics, friend groups and who-knows-who, it can feel like it would be easier to plan a bank vault heist than to plan table layouts. With so many different things to consider, it’s easy for the whole thing to become overwhelming for many couples.
But, it really doesn’t need to. With a clear process, creating a wedding table seating plan becomes far more manageable and, dare we say it, even enjoyable.
A well-thought-out seating chart for a wedding reception doesn’t just keep things organised. It helps your guests feel comfortable, encourages conversation and ensures your day runs smoothly from the moment everyone sits down.
In this article, we’re going to run through everything you need to know when it comes to creating a wedding seating chart. We’ll explore everything from juggling family dynamics to the unofficial rules no one ever told you about, as well as outline how to make a wedding seating chart for your special day.
Start organising your wedding guest list with Bridebook.
Do You Need a Wedding Seating Chart?
Not every wedding needs a detailed wedding seating chart. It all depends on your chosen venue and, of course, the size of your celebration. But, for the majority of weddings, it’s highly recommended that you put pen to paper and carefully plan where your guests are going to sit.
You’ll likely need a seating chart if:
- You’re hosting a medium to large wedding
- You have a formal sit-down reception
- Your venue has multiple tables
- Catering requires assigned seating
A seating chart helps avoid confusion, not just for your guests themselves, but also for the team helping to run your wedding. It also prevents you from making planning hiccups and ensures everyone you want to be there has a place.
You might not need a seating chart at your wedding if:
- You’re planning a very intimate or informal wedding
- You’re having a cocktail-style reception with no assigned tables
- Your venue is designed for free-flowing seating
Even in more relaxed settings, assigning at least tables (rather than specific seats) can make things easier for guests.
When to Create Your Seating Chart

Timing is key when it comes to planning. The last thing you want to do is leave it until a few days before, even if you do expect to be chasing a few people for those pesky RSVPs.
You should start working on your seating plan three or four weeks before your wedding at a minimum. It’s recommended to do this after all the RSVPs are confirmed, which is why you should have an RSVP deadline that accounts for the odd latecomer.
You should also wait until your venue layout is finalised, so make sure you iron things out with your contact at the venue (or wedding planner if you have one) before putting pen to paper.
This ensures you’re working with accurate guest numbers and avoids last-minute reshuffling.
If you’re following a structured wedding planning timeline, this stage generally comes after sorting your guest list and confirming your suppliers. It comes fairly late in the process, but not too late that you’re scrambling at the last minute.
For more info, read our wedding planning checklist helpful for keeping track of everything as you go.
Step-by-Step Guide to Creating a Wedding Seating Chart
If you’re interested in knowing exactly how to make a wedding seating chart, breaking it down into steps makes the process far easier.
Step 1: Finalise Your Guest List
Before anything else, you need a confirmed guest list. To do this, you need to make sure you’ve had all your RSVPs back. Don’t make any assumptions if you haven’t had them all back yet, so try to resist the urge to finalise your seating plan if there are still some pesky maybes lingering. Chase, chase, chase.
Once you have all your RSVPs, you have everything in stone (though things can change with who can and can’t come, but try not to stress if that happens). Make a note of meal choices, dietary requirements, plus-ones and children. An accurate guest list is the starting point of your entire wedding seating chart, so make sure you have everything you need.
One of the best ways to track your guest list is to use Bridebook’s guest list tool, which is accessible and easy. It’s also right there on your phone, so you can make changes as they happen.
Step 2: Decide Table Sizes and Layout
Next, take a close look at your chosen venue, as this will have a huge influence over what you can do with the space. Your venue will likely suggest a layout based on the number of guests you’ve invited, so make sure to use their experience as a starting point. You’ll want to think about:
- How many tables you can have
- How many guests can sit comfortably at each table
- Table shapes (round, long or mixed)
- Proximity to certain areas, like the dance floor or head table
You may have specific ideas, but lean on your venue’s expertise, as they’re the experts when it comes to how to use the space effectively. A wedding planning spreadsheet can also be helpful for mapping out your layout before committing to a final plan.
Step 3: Group Guests Logically
This is the stage where your seating plan starts to come together. You need to think about who needs to sit with who, where they need to sit, and who needs to perhaps not sit near who.
Common groupings include:
- Families and households
- Friendship groups
- Colleagues or shared social circles
You can also group guests based on shared interests or personalities to encourage conversation.
Step 4: Consider Family Dynamics
This is often the trickiest part of wedding seating chart etiquette. It’s about balancing relationships to make sure everyone gets on and there are no unwanted dramas on the day.
You may need to think about:
- Divorced or separated parents
- Family tensions
- Guests who don’t get along
In these situations, it’s perfectly acceptable to seat people separately to keep the atmosphere relaxed and enjoyable.
Step 5: Assign Tables

Once your groups are set, start assigning tables.
Tips for balanced tables:
- Avoid leaving one or two guests isolated
- Mix quieter and more outgoing personalities
- Keep table sizes consistent where possible
At this stage, you don’t necessarily need to assign specific seats, but you can at least assign specific tables.
Step 6: Assign Seats
Once you have the rest sorted, this part shouldn’t be all that difficult. You know everyone on the table should at least get along, so making sure certain people are sat together shouldn’t be too much of an issue.
Many couples choose to alternate genders, especially on round tables. But it’s entirely up to you. Another common choice is for the singles to be sat together; just make sure you’re not trying too hard to play cupid!
Wedding Seating Chart Etiquette
Understanding wedding seating chart etiquette helps you avoid difficult situations and makes sure everyone feels super comfortable. After all, you want everyone to enjoy your day, not feel isolated or awkward.
Where does the couple sit?
Most couples sit at a head table with their wedding party, or at a private sweetheart table.
Where do parents sit?
Parents are often seated at the head table or at nearby tables with close family members.
What about the wedding party?
Bridesmaids and groomsmen are typically seated with the couple or at dedicated tables nearby.
Should you mix guests?
Yes, definitely. Mixing guests can create a more social atmosphere, but try to include at least one familiar face at each table.
Where do children sit?
You can seat children with their parents or create a separate kids’ table for older children.
Wedding Seating Chart Ideas

If you’re looking for inspiration, there are plenty of wedding seating chart ideas to suit different styles and preferences.
Alphabetical seating charts
Guests are listed alphabetically and assigned to tables, which is simple and easy to navigate. But, the larger your guest list, the less feasible this is.
Table names instead of numbers
Instead of Table 1, 2, 3, you could use table names which can align with your relationship or the theme of your wedding. This could be something like:
- Places you’ve visited
- Your favourite films or books
- Your pets’ names
Match your seating chart to your wedding theme for a cohesive look. You can also seat guests on the tables they’re most likely to appreciate or understand, for an added touch of personalisation.
Mixed guest tables
Encourage new connections by mixing friendship groups, while still keeping guests comfortable.
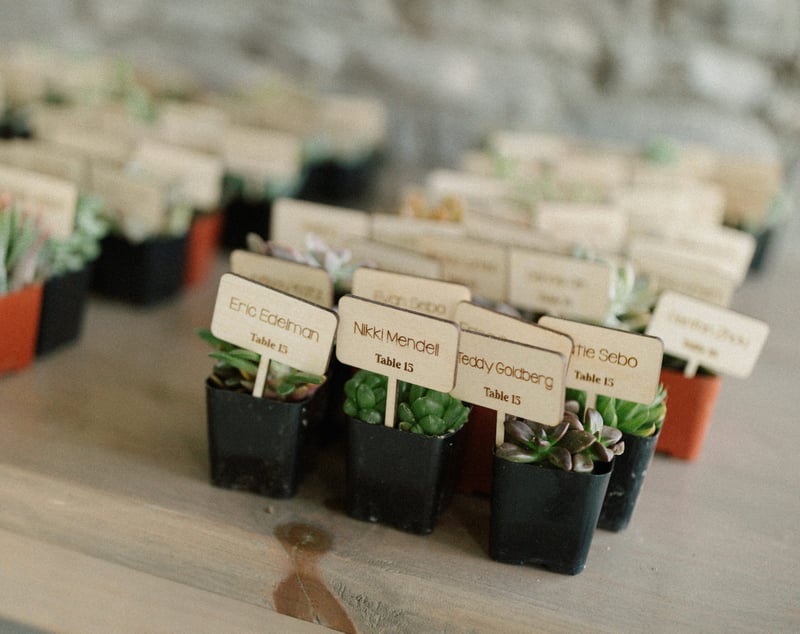
Visual displays
Creative displays, like mirrors, boards or hanging cards, can double as decor and make your seating chart more memorable. You can have a lot of fun creating these by hand, or have something printed out. There are so many possibilities to get creative here.
Common Wedding Seating Chart Mistakes
Even with the best intentions, it’s easy to make mistakes when planning your wedding table seating plan.
Leaving guests out
Always double-check your list to ensure every guest has a seat. The last thing you want is someone to turn up and find their name missing from the seating plan.
Ignoring relationships
Seating guests without considering their relationships can lead to awkward tables or even unwelcome moments of drama.
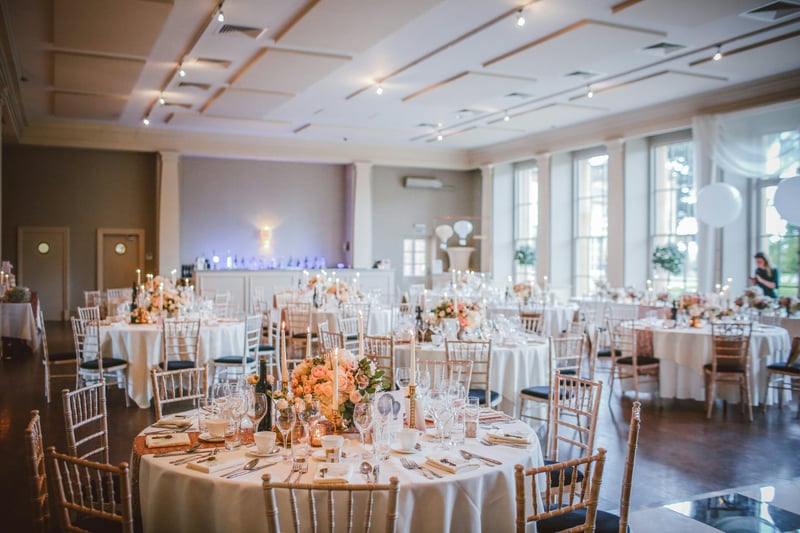
Overcrowding tables
Stick to your venue’s recommended capacity for comfort.
Last-minute changes
Avoid making major changes on the day, as this can confuse everyone. There’s always a huge urge to tinker and make changes, but make sure you commit and try not to overthink it.
Overcomplicating the plan
Keep your seating chart clear and easy to understand for guests.
For a broader look at planning pitfalls, read our guide on common wedding planning mistakes.
Manage Your Guest List With Bridebook
Creating your wedding seating chart becomes much easier when your guest list is organised.
With Bridebook, you can:
- Manage your guest list in one place
- Track RSVPs and plus-ones
- Keep notes on relationships and preferences
- Stay organised throughout the planning process
Having everything clearly laid out makes it far simpler to build a seating plan that works for everyone.
Create your free Bridebook account.
Creating Your Wedding Seating Chart
Your wedding seating chart plays a bigger role than you might expect. It orchestrates the atmosphere of your reception, helps guests feel comfortable and keeps your day running smoothly.
By starting with plenty of time and staying organised, you can create a seating plan that works for everyone. All you have to do is follow a clear step-by-step approach to make it as stress-free as possible.
And remember, there’s no such thing as a ‘perfect’ seating chart. The best plan is one that reflects your guests, your relationships and the kind of celebration you want to create.
FAQ: Creating a Wedding Seating Chart
How do I start creating a wedding seating chart?
Start with your final guest list, then map out your venue layout and group guests before assigning tables.
When should I finalise my wedding seating chart?
Aim to finalise it around 3-4 weeks before your wedding once RSVPs are confirmed.
Do I need to assign exact seats or just tables?
Some couples assign tables only, while formal weddings may also include specific seat assignments.
What’s the best way to handle difficult family dynamics?
Seat guests separately where needed to avoid tension and keep the atmosphere relaxed.
Should I mix guests who don’t know each other?
Yes, but include at least one familiar face at each table to keep guests comfortable.
How many people should sit at each table?
Typically, 8-10 guests per round table, but always follow your venue’s guidance.
What if someone cancels at the last minute?
Make small adjustments if needed, but avoid major changes on the day.
Ready to start planning? Download Bridebook today!
Related articles